True restoration of historic timber is an act of preservation, not renovation, prioritizing the health and history of the wood above all else.
- Effective restoration begins with diagnosis—identifying active threats like woodworm and confirming the authenticity of the timber—before any aesthetic work is considered.
- The goal is to enhance, not erase, the timber’s patina, using finishes and lighting to celebrate its character while improving the perception of space.
Recommendation: Before lifting a sander, consult a structural engineer to assess the beams’ load-bearing capacity and begin your project with a foundation of safety and respect for the building’s integrity.
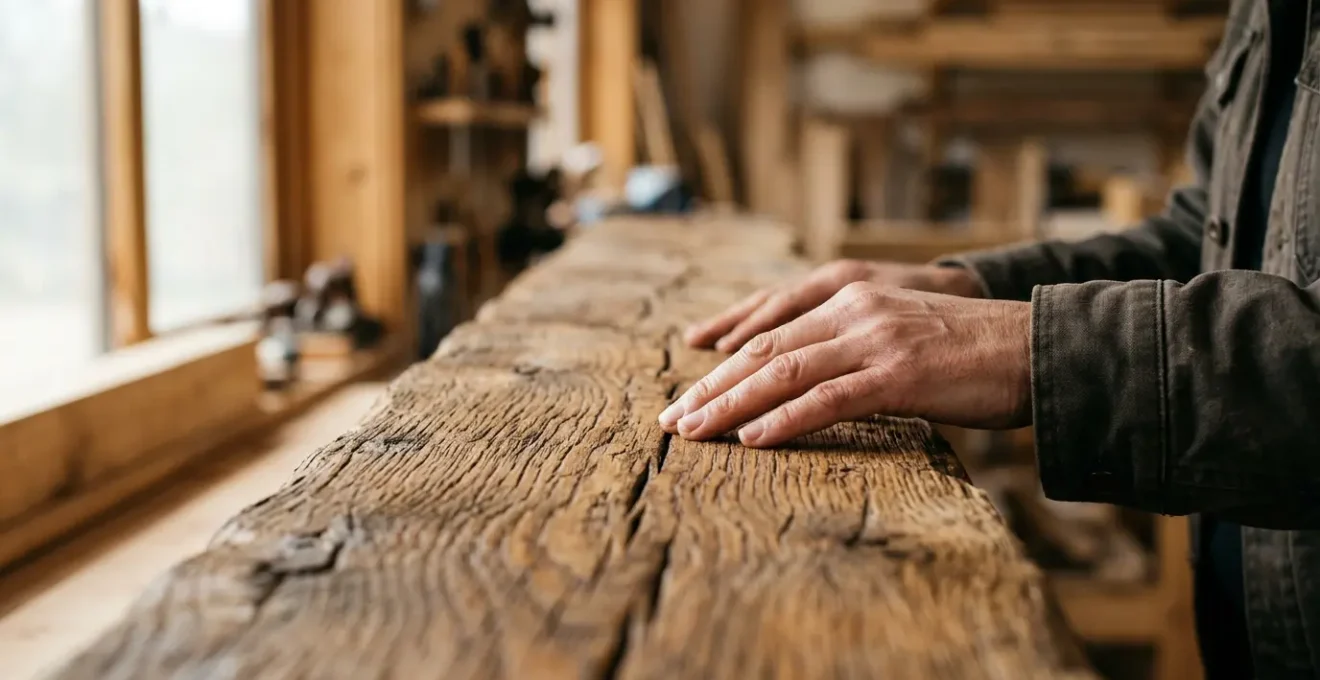
Uncovering a set of original wooden beams in an old farmhouse or property is a moment of architectural revelation. It’s a connection to the past, a glimpse into the structural honesty of the building. The immediate impulse for many renovators is to make them ‘perfect’—often involving aggressive sandblasting to strip them back to new wood or coating them in thick, modern paint. While well-intentioned, these common approaches can irrevocably damage the timber’s historic patina and, in some cases, its structural integrity.
A preservationist’s approach is fundamentally different. It is a process of architectural archaeology, where the goal is to stabilize, clean, and celebrate the wood as it exists. This involves understanding the story told by its imperfections, axe marks, and aged colouration. The key isn’t to erase the past but to make it a safe and beautiful part of the present. This requires a diagnostic mindset, distinguishing between active threats that need treatment and the benign signs of a long life that deserve reverence. The beams are the heart of the room, but their restoration must enter into a material dialogue with the surrounding elements—the walls, the light, and even the furniture.
This guide moves beyond simple aesthetics to offer a holistic framework for restoration. We will explore how to assess the health of your timber, make informed decisions about finishes, and integrate these historic elements into a cohesive and respectful design. By following these principles, you can ensure your beams are not just a design feature, but a testament to the home’s enduring soul.
This comprehensive guide details the essential steps and considerations for a respectful restoration. The following sections provide a roadmap, from initial diagnosis of the timber to the final, harmonious integration of the beams within your living space.
Summary: A Holistic Approach to Historic Beam Restoration
- How to Identify Active Woodworm in 100-Year-Old Beams?
- Dark Stain vs Natural Wax: Which Makes Ceilings Feel Higher?
- Faux vs Real Timber: Can You Spot the Difference at 3 Meters High?
- The Shadow Mistake: Where to Mount Downlights on Beamed Ceilings?
- How to Clean Dust From Rough-Hewn Beams 4 Meters Up?
- How to Fix Unraveling Rattan Bindings Before the Chair Breaks?
- How to Seal Exposed Brick to Stop Dust Without Changing the Look?
- How to Use Tactile Wall Treatments to Add Depth to Monochromatic Rooms?
How to Identify Active Woodworm in 100-Year-Old Beams?
Before any aesthetic consideration, the first step in responsible stewardship is a health assessment of the timber. The presence of tiny holes in a 100-year-old beam is almost a given, but the critical question is whether they are relics of the past or signs of a current, destructive infestation. Misdiagnosis can lead to either unnecessary, costly chemical treatments or, conversely, ignoring a problem that is actively compromising the wood. An active infestation is most often linked to moisture, as wood-boring insects require it to thrive. Professional timber surveys show that problems are most prevalent in timber with moisture readings over 18%, making dampness a primary red flag.
Identifying a live infestation is a process of careful observation, a core tenet of diagnostic preservation. You are looking for fresh evidence of larval activity. The most telling sign is ‘frass’—a fine, pale, powdery dust that looks like sawdust—accumulating below or in the exit holes. This is the waste product of tunneling larvae. If it reappears shortly after being cleaned away, the problem is current. Another key indicator is the appearance of new holes, which will have sharp, clean edges and a lighter colour compared to the darkened, worn edges of historical holes. In very quiet conditions, particularly at night, you may even be able to hear the faint ticking of the Death Watch Beetle, a common inhabitant of old hardwood beams.
To confirm your suspicions, you can conduct several practical tests:
- The Frass Test: Thoroughly clean all visible dust from the beams and surrounding areas. Check back within a few days to a week. The reappearance of pale frass is a definitive sign of an active infestation.
- The Paper Trap Method: Place sheets of white paper or card on the floor directly beneath the suspect beams. Any new frass will be highly visible against the white background.
- Visual Hole Analysis: Use a marker to circle existing holes in a small test area. Revisit after a few weeks or a full season. Any new, unmarked holes are evidence of newly emerged adult beetles.
- The Acoustic Test: During a quiet evening, press your ear against the beam. A faint, rhythmic ticking sound can indicate the presence of Death Watch Beetles, particularly in damp oak or elm.
If activity is confirmed, a professional treatment with a targeted, low-toxicity product like a boron-based preservative is the correct course of action. This ensures the threat is neutralized without saturating the historic timber with unnecessarily harsh chemicals.
Dark Stain vs Natural Wax: Which Makes Ceilings Feel Higher?
Once the structural and biological health of the beams is assured, the conversation turns to aesthetics. The choice of finish is one of the most impactful decisions you will make, profoundly affecting not just the beams themselves but the perception of the entire room. The debate often centers on dark stain versus a more natural, lighter finish. While dark, almost black, beams can create a dramatic, historic contrast, they carry significant ‘visual weight’. This can make a ceiling feel lower and the space more enclosed, which can be a drawback in rooms with standard-height ceilings.
A lighter finish, such as a clear or lightly pigmented natural wax, works with light rather than absorbing it. This approach respects the timber’s natural colour and grain—its inherent patina—while helping to make the ceiling feel higher and the room more expansive. This isn’t just a matter of opinion; it’s backed by perceptual science. In fact, research published in the Quarterly Journal of Experimental Psychology confirms that, in controlled studies, light ceilings appeared significantly higher than darker ones. A wax or oil finish also has the advantage of nourishing the wood and being ‘breathable’, unlike some heavy stains or varnishes that can seal in moisture.
The decision should be guided by your room’s specific characteristics. In a grand space with a high, vaulted ceiling, the anchoring effect of dark beams can be a stunning design choice. However, for the majority of farmhouses or cottages where ceiling height is more modest, a lighter touch is often more successful. The goal is to achieve structural honesty, allowing the beams to be a feature without letting them dominate or oppress the space. A natural wax finish often strikes the perfect balance, celebrating the wood’s history while contributing to an airy, light-filled environment.
Faux vs Real Timber: Can You Spot the Difference at 3 Meters High?
In the process of architectural archaeology, you must first be certain of what you’ve found. Not all beams are created equal, and some are not even wood. High-quality polyurethane or foam faux beams can be surprisingly convincing, especially when viewed from a distance on a high ceiling. Before you invest time and resources into a restoration plan, it is absolutely essential to authenticate the material. Attempting to sand or apply a penetrating oil to a faux beam will, at best, be ineffective and, at worst, cause irreparable damage to its finish.
From the ground, the most obvious tell is often an unnatural perfection. Genuine historic beams bear the marks of time: slight twists, non-uniform edges (chamfers), shrinkage cracks (known as ‘checking’), and even old repair marks. Faux beams, by contrast, are often perfectly straight and uniform. Their grain patterns, while sophisticated, may repeat from one beam to another if they were cast from the same mold. A closer inspection, if safe access is possible, will reveal more. The texture of a molded beam can feel subtly different, and a firm tap will often give the game away. Real, dense timber produces a solid, low-pitched ‘thud,’ whereas a hollow faux beam will return a higher-pitched, resonant ‘tock’.
Authenticating your beams is a crucial diagnostic step that should never be skipped. It ensures you are applying the right preservation techniques to the right material, upholding the integrity of your restoration project.
Your Field Guide: Authenticating Timber Beams
- The Repetition Test: Carefully examine multiple beams from different angles. Look for repeating knot patterns, identical cracks, or matching saw marks. Authentic timber is unique; molded beams often betray their origin through repetition.
- The Acoustic Fingerprint: If you can safely reach a beam, tap it firmly with your knuckle. A solid, dense ‘thud’ indicates real wood. A hollow, higher-pitched ‘tock’ strongly suggests it is a hollow polyurethane or foam replica.
- The Imperfection Assessment: Look for the honest signs of aging. Search for slight, natural twists along the beam’s length, non-uniform chamfered edges, historical repair marks, or the fine cracks known as ‘checking’. Faux beams are often too straight and too perfect.
- The Thermal Test: On a cool day, touch the beam’s surface. Dense, solid timber is a poor insulator and will feel significantly colder to the touch than the room’s air. Plastic or foam faux beams, being better insulators, will feel closer to room temperature.
The Shadow Mistake: Where to Mount Downlights on Beamed Ceilings?
Integrating modern lighting with historic beams is a delicate balancing act. The most common error is to treat the ceiling as a flat plane, placing downlights in a simple grid. This approach ignores the three-dimensional nature of the beams and creates harsh, unflattering shadows, a phenomenon known as ‘scalloping’ on the walls. A successful lighting scheme works *with* the beams, using them to conceal fixtures and shape the light to create atmosphere and highlight architectural features. The key is to think in layers, combining different types of light to serve different functions.
A sophisticated strategy for beamed ceilings involves three distinct layers of light. The first is Ambient Light, which provides the room’s overall illumination. Instead of relying solely on downlights, a wonderful technique is to place uplighters on top of the beams themselves. This bounces soft, indirect light off the ceiling, creating a gentle glow that makes the entire room feel larger and more open without any direct glare. The second layer is Task Light, which provides focused illumination for specific areas like kitchen counters or reading nooks. This is where downlights are most effective, but they must be placed judiciously between the beams to prevent harsh shadows.
The final layer, and the one that truly brings the architecture to life, is Accent Light. This involves using narrow-beam spotlights to ‘graze’ the textured surfaces of the beams or adjacent brick walls. This technique creates deliberate, dramatic shadows that reveal the texture and depth of the materials, turning the beams from simple structural elements into sculptural features. By centering fixtures symmetrically between the beams and considering all three layers, you avoid the common ‘shadow mistake’ and create a lighting scheme that feels both functional and deeply connected to the home’s historic character.
- Layer 1 – Ambient: Install uplighters (like LED strips or small spots) on the top surface of the beams. This bounces light off the ceiling, creating a soft, ambient glow that eliminates the cavernous feeling and makes the room feel larger.
- Layer 2 – Task: Position focused downlights or pendants *between* the beams to illuminate key zones. A good rule of thumb is to place them a distance from the wall that is roughly half the distance between each light, preventing the ‘scalloping’ effect.
- Layer 3 – Accent: Use narrow-beam spotlights, either from the track or ceiling, to graze the vertical faces of the beams or a feature brick wall. This creates intentional, beautiful shadows that add dramatic architectural depth and texture.
How to Clean Dust From Rough-Hewn Beams 4 Meters Up?
Long-term preservation involves routine maintenance, and for high, rough-hewn beams, the primary challenge is dust. Their textured surface is a magnet for dust and cobwebs, which can dull their finish and impact indoor air quality. Cleaning beams situated 4 meters (over 13 feet) high presents a dual challenge: safe access and effective dust removal without damaging the wood or spreading debris. Using a simple feather duster is often counterproductive, as it merely redistributes fine particles into the air. The professional approach focuses on capturing dust rather than scattering it.
For safe access, an A-frame ladder may suffice for lower ceilings, but for heights of 4 meters or more, renting a small mobile scaffold tower is a far safer and more efficient solution. It provides a stable, wide platform, allowing you to work with both hands and avoid the dangerous practice of overreaching from a ladder. Once you have safe access, the cleaning process should be methodical. Start with a dry-capture method. A high-tack lint roller on an extension pole is surprisingly effective for picking up loose dust and cobwebs from the main surfaces. For the deep cracks and grooves characteristic of rough-hewn timber, a soft-bristled nylon brush should be used to gently agitate the dust, followed immediately by a vacuum with a brush attachment to capture the dislodged particles.
For more stubborn grime, particularly in kitchens where grease can accumulate, a targeted approach is necessary. Use a quality wood-safe degreaser applied with a soft brush only to the affected areas. It is crucial to then ‘rinse’ the area with a microfiber cloth that has been dipped in clean water and wrung out until it is almost dry. This removes any residue without saturating the old wood.
Case Study: The Telescoping Roller Method
A homeowner with high, vaulted beams devised an efficient system for biannual deep cleaning. After covering all furniture, they used a telescoping paint roller fitted with a lamb’s wool cover. The roller was saturated in a pan of warm water and wood soap, then used to effectively ‘mop’ the beams, always moving in the direction of the wood grain. For monthly upkeep, the same roller was used dry, as the lamb’s wool was excellent at attracting and capturing dust. This rolling motion was key, as it lifted debris out of the rough texture instead of pushing it further in, significantly extending the time between deep cleans.
How to Fix Unraveling Rattan Bindings Before the Chair Breaks?
With the primary architectural elements stabilized and cleaned, the preservationist’s eye turns to the objects that furnish the space. A meticulously restored room featuring historic beams can feel disharmonious if it contains decaying or broken furniture. The principle of material dialogue extends to these pieces. An unraveling rattan binding on a chair, for example, introduces a note of neglect that detracts from the room’s overall sense of care and permanence. Addressing such small repairs before they become catastrophic failures is part of a holistic approach to living in a historic space.
Repairing a rattan binding is a manageable task that restores both function and form. The first step is material diagnosis. You must determine if you are working with natural reed or a synthetic plastic equivalent. The ‘hot pin test’ is a reliable method: a heated pin will melt synthetic rattan, but will only singe and slightly char natural reed. This distinction is crucial for selecting the right adhesive and preparation method. According to expert advice on specialist wood and material finishes, the adhesive choice is critical for a lasting bond.
If you are working with natural rattan, it must be soaked in warm water for about 30 minutes before you begin. This makes the reed pliable and allows you to re-wrap it tightly around the chair joint without it snapping. Use a clear, flexible PVA glue, which will move with the natural material as it expands and contracts. For synthetic bindings, a stronger two-part epoxy is required to create a durable bond with the chair frame. To achieve a professional, invisible finish, complete the wrap by tucking the end of the reed back under the last two loops, pulling it tight to lock it in place, and then adding a tiny drop of glue on the inside of the binding where it won’t be seen.
How to Seal Exposed Brick to Stop Dust Without Changing the Look?
This philosophy of material care extends to the other structural surfaces that frame your historic timbers. Exposed beams are frequently paired with exposed brick walls, creating a classic, rustic aesthetic. However, old brick can be a persistent source of fine red dust and white, salty deposits known as efflorescence. The common solution is to apply a sealer, but the wrong choice can ruin the wall’s appearance, creating a permanent, artificial-looking wet sheen and potentially causing long-term damage by trapping moisture. The preservationist’s goal is to stop the dust while keeping the brick’s matte, natural appearance completely unchanged.
The key is to choose a penetrating sealer, not a film-forming one. Look for a water-based silicate densifier or a similar impregnating sealer. These products work by soaking into the porous brick and hardening it from within, rather than creating a plastic-like film on the surface. The result is a stabilized surface that no longer sheds dust, but remains visually identical to unsealed brick. It is absolutely mandatory to test any product on a spare brick or a very inconspicuous area first. Even products marketed as ‘matte’ can slightly darken the brick; you must let the test patch dry for a full 24 hours to see the true final effect.
Furthermore, it is vital to ensure the sealer is rated as ‘breathable’ or ‘microporous’. Old buildings need to manage moisture, and non-breathable acrylic sealers can trap water vapor within the wall, leading to spalling (surface flaking) and frost damage over time. Before sealing, it’s also wise to address any existing efflorescence by using a sacrificial poultice paste to draw the salts out of the brick. This ensures you are sealing a clean, stable surface, not trapping the source of the problem underneath. The guidance from professionals in wood and surface finishing emphasizes the importance of breathability for historic materials.
Key Takeaways
- Diagnose Before You Act: The foundation of all successful restoration is a thorough assessment. Confirm the timber is real, check for active pests, and understand its condition before any treatment.
- Respect the Patina: The goal is not to make old wood look new. Use finishes that enhance, rather than erase, the timber’s natural age, colour, and texture.
- Create a Material Dialogue: Beams do not exist in isolation. Consider their relationship with light, adjacent surfaces like brick, and the overall room volume to create a harmonious, integrated space.
How to Use Tactile Wall Treatments to Add Depth to Monochromatic Rooms?
The final layer of artistry in a restoration project is achieving a cohesive whole. Once the primary elements—the timber beams and brick walls—are stabilized and celebrated, the focus shifts to creating a harmonious envelope around them. This is where the concept of material dialogue culminates. In a room with such strong, characterful features, a simple, flat paint job can feel one-dimensional. Using tactile wall treatments, even within a monochromatic color scheme, can add a layer of depth and sophistication that elevates the entire space.
In a monochromatic design, texture becomes a substitute for color. You can create profound visual interest by layering materials that interact with light differently. For instance, pairing the rugged texture of an exposed beam with the subtle, chalky finish of a limewash wall, the soft sheen of silk curtains, and the deep pile of a wool rug creates a rich sensory experience. According to design principles highlighted by sources like leading home and garden publications, texture is a key tool for adding warmth and complexity.
Wall treatments that play with shadow are particularly effective. Board-and-batten, fluted wood panels, or even grasscloth wallpaper create micro-shadows that shift throughout the day as the natural light changes. This makes the walls feel dynamic and alive without introducing a new color. The ‘fifth wall’—the ceiling—is also a critical part of this equation. If you have exposed beams, you can echo their strong tactile presence by using a subtle wood-grain wallpaper or a wooden accent on a feature wall. This creates a cohesive, enveloping design that feels intentional and deeply connected, turning a simple room into a rich, tactile sanctuary that honors its historic core.
Begin your restoration project not with a sander, but with a careful assessment. Apply these principles of diagnostic preservation and material dialogue to create a space that is not just renovated, but reborn with its history and structural honesty beautifully intact.