The secret to a compelling cabinet of curiosities is to stop decorating and start curating, treating your collection with the narrative discipline of a museum.
- Group objects by story or theme, not just by color, to create a sophisticated visual dialogue.
- Rotate your collection—hiding up to 50%—to combat ‘object blindness’ and ensure every piece on display feels special.
Recommendation: Begin not by adding, but by editing. Remove half the items from a single shelf to immediately give the remaining objects the breathing room they need to tell their story.
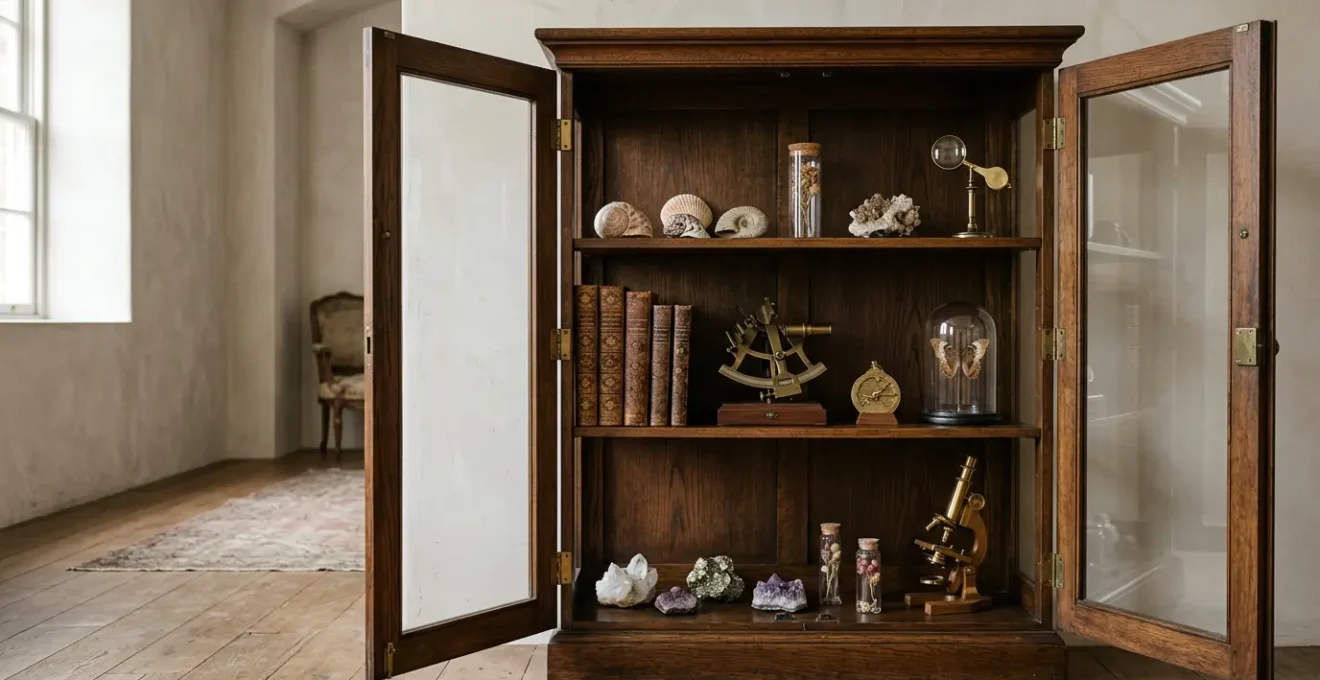
That cherished collection of travel souvenirs, inherited oddities, and unique finds begins with excitement. Each object is a story. But as the collection grows, the cabinet designed to showcase them can slowly transform into a visual cacophony—a cluttered shelf where individual narratives are lost in the crowd. The joy of collecting gives way to the anxiety of display. Many attempt to solve this with standard design advice: group by color, vary object heights, or simply buy a bigger cabinet. These are temporary fixes that address the symptom, not the cause.
The fundamental misunderstanding is treating your collection as decoration. These objects are artifacts of your life; they deserve to be curated. What if the solution wasn’t in how you arrange, but in how you *edit*? What if the empty space on a shelf was just as important as the object placed upon it? The secret lies in applying the discipline of a museum curator to your own home, shifting the goal from filling space to telling a powerful, focused story. It’s a process of creating narrative weight and leveraging intentional absence to elevate the pieces that matter most.
This guide will walk you through the professional principles of curation, adapted for the home collector. We will explore how to group objects for maximum impact, use lighting not just to illuminate but to direct a story, secure your fragile treasures against unseen risks, and embrace the transformative “Museum Method” of rotation. By the end, you will have a new framework for thinking about your collection—not as a jumble of things, but as a living, breathing exhibition of your personal history.
Summary: A Curator’s Framework for an Intentional Cabinet of Curiosities
- Color vs Theme: Which Grouping Strategy Calms Visual Chaos?
- How to Retrofit LED Lighting Into Vintage Display Cabinets?
- The Vibration Risk: Securing Fragile Curios Near Busy Streets
- The “Museum Method”: Why You Should Hide 50% of Your Collection
- How to Mix Sea Shells With Crystal Without Cheapening the Look?
- How to Dimension Art Niches for Versatility Over Decades?
- How to Display Investment Pieces Without UV Damage?
- How to Build Niches and Alcoves Specifically for Sculptural Decor?
Color vs Theme: Which Grouping Strategy Calms Visual Chaos?
The most common impulse when facing a cluttered shelf is to group objects by color. While this can create an initially pleasing aesthetic, it’s a superficial strategy that often ignores the soul of the collection. A truly curated display prioritizes theme and narrative over simple color matching. Instead of a “blue shelf,” consider a “maritime history” shelf, where a blue sea-glass bottle, a weathered brass compass, and a sepia-toned postcard of a port city create a rich, cohesive story. This method creates a visual dialogue between objects, inviting the viewer to look closer and uncover connections.
Color is not the enemy; it is a powerful tool that should serve the narrative, not dictate it. In fact, research shows that 60% to 90% of a person’s judgment about a product is based on color alone within the first 90 seconds. A sophisticated approach uses color as a unifying accent within a thematic group. During the Royal Albert Memorial Museum’s acclaimed renovation, curators used a varied palette of background tones to give visual lift to a collection dominated by brown artifacts, enhancing their perceived texture and form. Similarly, you can use a consistent background color or plinth to unite thematically linked but aesthetically different objects, allowing their individual stories to shine within a structured framework.
How to Retrofit LED Lighting Into Vintage Display Cabinets?
Lighting transforms a simple cabinet into a theatrical stage. For vintage or antique cabinets, retrofitting modern lighting requires a delicate touch to preserve the piece’s integrity while highlighting the collection. The goal is to make the light source disappear, leaving only its effect. Modern LED strips and puck lights are ideal due to their low profile, minimal heat output, and energy efficiency, protecting delicate artifacts from thermal damage. The key is to think like a curator, using light to guide the eye and assign importance.
The installation should be as non-invasive as possible. Wires can be hidden in corners or along the back edges of shelves. For a completely reversible solution, consider using rechargeable, motion-activated, or remote-controlled LED puck lights that adhere to surfaces without drilling. This allows you to create pools of light for specific “hero” objects. The choice of light quality is paramount for achieving a professional, museum-like feel.
To achieve a truly professional result, specific technical choices matter. A high Color Rendering Index (CRI) ensures that the colors of your objects are displayed accurately, while the right color temperature creates the desired atmosphere. Here are the museum-grade specifications to look for:
- Select LED lights with a CRI of 95 or higher to ensure accurate color representation.
- Choose a color temperature between 2700K-3000K to replicate a warm, historical atmosphere suitable for vintage pieces.
- Opt for low-heat LED technology to protect delicate artifacts from temperature-related degradation.
- Install adjustable beam angle fixtures to create “light zones,” with micro-spotlights for hero objects and diffused lighting for backgrounds.
- Use dimming systems, ideally with timers, to control the total annual light exposure and reduce cumulative damage.
- Employ invisible installation methods like conductive tape or rechargeable lights for a wire-free, reversible solution.
The Vibration Risk: Securing Fragile Curios Near Busy Streets
One of the most overlooked threats to a collection is not a sudden impact, but the slow, relentless effect of micro-vibrations. If your home is near a busy road, railway, or even subject to heavy footfalls on wooden floors, these constant tremors can cause objects to “walk” over time, eventually falling from a shelf. Fragile items like porcelain, glass, or delicate natural specimens are particularly at risk. Protecting against this invisible danger is a standard practice in museums and is easily adaptable for the home curator.
The solution lies in specialized, non-damaging adhesives designed for conservation. Products like museum wax, gel, and putty create a secure but reversible bond between the object and the shelf. They absorb micro-vibrations and prevent movement without staining or damaging either the artifact or the furniture surface. The choice of product depends on the object’s material, weight, and transparency. Applying these products correctly is simple and provides invaluable peace of mind for any collector with fragile pieces.
To secure your collection like a professional, follow these museum-grade application guidelines:
- Use clear Museum Wax for opaque-based objects like ceramics or metal. Apply a pea-sized amount to the base and press firmly to create a seal.
- Apply transparent Museum Gel for glass or crystal items where invisibility is crucial. The gel conforms to the object’s weight and shape.
- Choose Museum Putty for smaller, lightweight objects that require a stronger grip; it offers superior holding power against vibrations.
- For tall, narrow items, roll the adhesive into small balls or thin strips and apply them around the perimeter of the base for a continuous, stable bond.
- To remove a secured object, twist and lift from the base. Never pull straight up, as this can create suction and damage delicate surfaces.
- Periodically check secured items (every 3-6 months) and reapply the adhesive if it shows signs of hardening or losing its grip.
The “Museum Method”: Why You Should Hide 50% of Your Collection
This may sound counter-intuitive, but one of the most powerful curatorial strategies is to display less. Museums around the world often show only a small fraction of their total collection at any given time. This isn’t just due to space constraints; it’s a deliberate strategy to combat a psychological phenomenon known as “object blindness.” When we are constantly exposed to the same objects, our brains begin to filter them out. They become part of the background, and we stop truly *seeing* them. By rotating your collection, you reintroduce novelty and force your brain to pay attention again.
Adopting The Museum Method at home means selecting the strongest, most compelling half of your collection for display and putting the other half into careful storage. Every few months or once a year, you can “deinstall” the current exhibition and “install” a new one from your archives. This practice has three profound benefits: it immediately eliminates clutter, it makes every object on display feel more special and intentional, and it gives you the joy of rediscovering your own treasures time and time again. It transforms your cabinet from a static shrine into a dynamic gallery with a rotating exhibition schedule.
The Science of Seeing: The Ashmolean Museum Study
This principle is backed by science. A 2018 study on change blindness at the Ashmolean Museum demonstrated that even in a setting designed for close observation, viewers often fail to notice changes between similar artifacts. The study confirmed that constant exposure leads to habituation. By periodically changing what is on display, curators—and you—can reset the viewer’s perception, restoring the capacity for genuine appreciation and detailed observation for each individual object.
How to Mix Sea Shells With Crystal Without Cheapening the Look?
The challenge of mixing high-value items like crystal with humble, natural finds like sea shells is a common curatorial puzzle. The fear is that the “low” will devalue the “high,” resulting in a display that feels cheapened. The solution is not to segregate them, but to create a strong narrative bridge that unites them. The perceived value of an object is dictated by its context. If a shell and a crystal are placed together without a story, they are just a shell and a crystal. But if they are presented as “Treasures from the Earth’s Extremes—the Deepest Ocean and the Hardest Stone,” they suddenly engage in a compelling dialogue.
Elevation is achieved through intentional presentation. Place the sea shell on a small, custom-made brass stand. Position the crystal on a piece of dark, polished slate. Light them individually. By treating the humble object with the same reverence as the expensive one, you elevate its status and create a unified, sophisticated composition. The key is to shift your thinking from an object’s monetary value to its narrative or aesthetic contribution to the overall story you are telling. In a well-curated collection, a perfectly formed pebble can hold its own next to a diamond if its placement tells us that it, too, is a masterpiece of nature.
This philosophy echoes the very origins of cabinets of curiosities, which were never about monetary worth alone. As the 16th-century writer on the subject, Samuel Quiccheberg, articulated:
The ideal collection should be nothing less than a theatre of the universe…keys to the whole of knowledge.
– Samuel Quiccheberg, 16th century writer on cabinets of curiosities
How to Dimension Art Niches for Versatility Over Decades?
Built-in niches and alcoves offer a permanent, architectural solution for showcasing treasured objects. However, their permanence can also be a limitation. A niche built for a specific sculpture today might not fit the art you acquire a decade from now. The key to designing for long-term versatility is to rely on timeless principles of proportion rather than the dimensions of a single object. By doing so, you create a space that will feel harmonious and balanced, regardless of what it holds in the future.
The most enduring of these principles is the Golden Ratio. This mathematical proportion, found throughout nature, art, and architecture, is inherently pleasing to the human eye. Designing a niche with proportions that approximate this ratio ensures it will have a sense of classical, built-in elegance. When planning a niche, instead of asking “How big is my sculpture?”, ask “What is a beautifully proportioned rectangle for this wall?”. This creates a versatile frame that can gracefully accommodate a tall vase, a wide bowl, or a cluster of smaller objects over the years.
For maximum flexibility, aim for dimensions that follow this classical principle. For instance, classical architectural principles recommend designing niche proportions using the Golden Ratio (approximately 1:1.618). A niche that is 10 inches wide would feel balanced at around 16 inches high. Building with adequate depth (at least 8-12 inches) is also crucial, as it allows for layering objects and accommodating more substantial sculptural pieces. This foresight ensures your architectural feature remains a versatile asset for your collection for decades to come.
How to Display Investment Pieces Without UV Damage?
For investment-grade pieces—be it a signed print, a delicate textile, or a rare artifact—the primary curatorial duty is preservation. The single greatest threat to these items is often invisible: ultraviolet (UV) light. Emitted by the sun and some forms of artificial lighting, UV radiation causes irreversible damage, leading to faded colors, yellowing, and material degradation. Displaying these pieces safely requires a multi-layered strategy that goes beyond simply keeping them out of direct sunlight.
A professional approach involves controlling the entire light environment. This starts with physical barriers. Custom vitrines or frames should use 99% UV-filtering museum acrylic or laminated glass. While more expensive than standard glass, it is the most effective frontline defense. Secondly, you must manage light exposure. Even UV-filtered light can cause damage over time. Implementing a “light budget” using smart timers to limit display lighting to a few hours each evening significantly reduces the total cumulative exposure. Finally, the light source itself matters. Modern, museum-grade LED lights emit virtually no UV radiation and minimal heat, making them far safer than older halogen or incandescent bulbs.
Action Plan: Your 5-Step UV Protection Audit
- Points of Contact: Map the sun’s path through your rooms across different seasons to identify all areas receiving direct or strong indirect sunlight. Inventory all windows and doors that act as light sources.
- Collecte: Audit your existing protective measures. Do your frames have UV-filtering glazing? Are you using any window films? List all your current lighting sources (e.g., LED, halogen, incandescent).
- Cohérence: Compare your findings to museum standards. Are your most valuable pieces in the safest, darkest zones? Are you still using high-UV output halogen bulbs near sensitive art?
- Intensity Check: Evaluate the purpose of your lighting. Is the intensity appropriate for the object, or is it overlit? Use a light meter app to get a rough idea of lux levels—museums often aim for as low as 50 lux for sensitive items.
- Plan d’Intégration: Create a prioritized list of actions. Start with the highest-value items. This could be replacing the glass in one frame with museum acrylic or swapping out a single halogen bulb for a high-CRI, low-UV LED.
Combining these strategies creates a robust defense for your most cherished pieces. As a study of professional museum lighting practices shows, the most effective preservation comes from layering multiple protective measures: UV-filtering glazing, controlled LED sources, and strategic placement.
Key takeaways
- Prioritize Narrative Over Aesthetics: Group objects by the story they tell together, not just by matching colors, to create a display with depth and meaning.
- Embrace The Museum Method: Actively rotate your collection, keeping a portion in storage to combat “object blindness” and ensure every piece on display feels special and intentional.
- Curate with Light and Protection: Use museum-grade LED lighting to sculpt your display and employ UV-filtering materials and security adhesives to preserve and protect your most valuable artifacts.
How to Build Niches and Alcoves Specifically for Sculptural Decor?
Building a niche for a three-dimensional object requires thinking beyond a simple cutout in the wall. A successful alcove acts as a stage, designed to enhance the sculpture’s form, texture, and presence. The most critical element in achieving this is not the dimension of the niche itself, but the strategic application of light within it. A single overhead light will flatten a sculpture, erasing the very depth you aim to showcase. A professional, three-dimensional effect is achieved with a classic gallery technique: three-point lighting.
This technique uses multiple light sources to sculpt the object visually. A ‘key light’ provides the main illumination, a ‘fill light’ softens shadows, and a ‘backlight’ separates the object from its background, giving it volume. In the confined space of a niche, this can be achieved with miniature, adjustable LED spotlights. These fixtures can be recessed into the top, sides, or even the base of the alcove for precise control. The goal is to create a play of light and shadow that reveals the artist’s work and gives the piece a dynamic, living quality within its architectural frame.
To implement this professional technique effectively, consider the following specifications:
- Position a ‘key light’ as the main source, typically at a 45-degree angle, to reveal form and create intentional shadows.
- Add a ‘fill light’ at a reduced intensity (30-50% of the key light) on the opposite side to soften harsh shadows without eliminating depth.
- Install a ‘backlight’ or ‘rim light’ behind and slightly above the sculpture to create separation from the niche background and emphasize its volume.
- Use micro-LED spotlights with adjustable beam angles for precise directional control within the alcove.
- Select museum-grade LEDs with CRI 95+ and a 2700K-3000K color temperature for accurate material rendering.
- Consider recessed track lighting or miniature zoom fixtures for a subtle, architecturally integrated installation.
The journey from a cluttered collector to an intentional curator begins not with a grand redesign, but with a single, thoughtful choice. Begin today by selecting one shelf or one corner of your cabinet. Apply these principles of narrative, light, and intentional editing. The transformation you will witness in that small space will provide the momentum to redefine your entire collection, turning it from a static display of things into a dynamic and personal museum of your life’s story.