Sustaining a living wall in low light is an act of bio-engineering, not gardening; its survival depends on the systemic integrity of its life-support hardware, not just plant choice.
- Leaks and plant death are preempted by choosing a contained, recirculating irrigation system suitable for apartment constraints.
- Mold is prevented not by simple ventilation, but by engineering a structural air gap and managing room humidity to a precise 30-50% range.
Recommendation: Prioritize the design of the wall’s underlying systems—irrigation, ventilation, and structural support—before selecting a single plant.
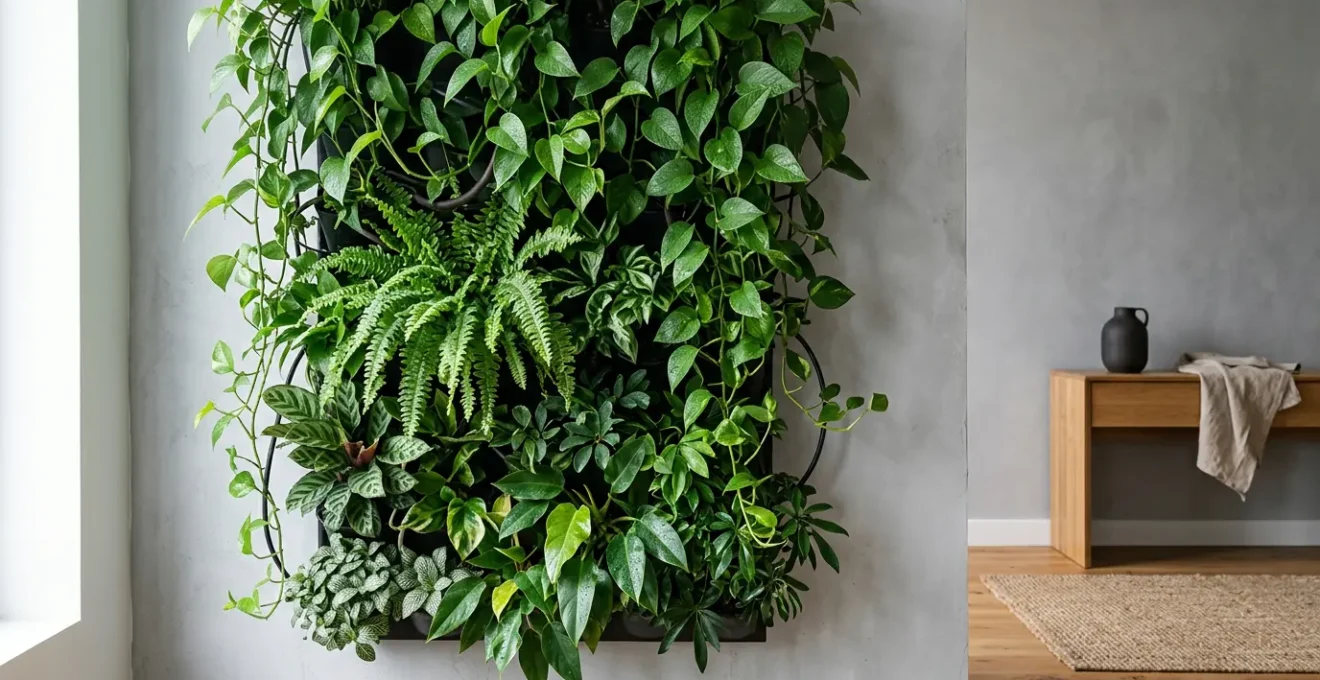
For the urban dweller craving a slice of nature, the vertical living wall presents a compelling solution—a vibrant, air-purifying tapestry of green within the confines of an apartment. Yet, the dream often collides with the harsh reality of low-light conditions, where insufficient sunlight leads to plant decay, overwatering causes catastrophic leaks, and poor airflow culminates in mold. The common advice—to simply “choose low-light plants” and “use a grow light”—dramatically underestimates the complexity of the challenge. This approach treats the living wall as a simple potted plant, ignoring the intricate ecosystem dynamics at play.
The fundamental error is a failure of perspective. If the true key to a thriving indoor ecosystem was not in the foliage itself, but in the engineered systems that sustain it? Success requires a shift in mindset from a gardener to a bio-engineer. This guide abandons superficial tips to provide a technical blueprint for constructing and maintaining a robust vertical life-support system. We will dissect the critical engineering decisions that preempt failure, ensuring your living wall doesn’t just survive, but thrives as a testament to well-designed indoor nature.
This article provides a technical deep-dive into the core systems that ensure the longevity and health of your vertical garden. We will explore everything from leak-proof irrigation and plant biomechanics to mold prevention and the strategic integration of lighting, treating your wall as the sophisticated ecosystem it is.
Summary: The Engineering Blueprint for Your Indoor Ecosystem
- Recirculating vs Direct Plumbed: Which Irrigation System Prevents Leaks?
- Ferns vs Pothos: Which Plants Survive Vertical Gravity Best?
- The Mold Risk: How to Ventilate Behind a Green Wall?
- How to Hide Grow Lights So Your Living Wall Doesn’t Look Like a Lab?
- Real vs Preserved Moss: Which Offers Better ROI Over 5 Years?
- How to Install a Living Wall That Doesn’t Leak or Die?
- The Humidity Risk: Will Wallpaper Peel in a Shower Room?
- Why Does Biophilic Design Improve Sleep Quality in Urban Apartments?
Recirculating vs Direct Plumbed: Which Irrigation System Prevents Leaks?
The single greatest point of failure for an apartment living wall is water damage. The choice of irrigation is therefore not a matter of convenience, but of risk engineering. While commercial installations often favor direct-plumbed systems that connect to a building’s main water line, this approach is fundamentally unsuited for most residential contexts. It requires significant plumbing modifications, building approvals, and introduces multiple permanent connection points that elevate the risk of catastrophic leaks. For the apartment dweller, the superior engineering choice is a recirculating system.
This self-contained model operates like a closed-loop ecosystem. A submersible pump inside a dedicated reservoir pushes water up to the top of the wall, where it drips down through the growing medium, nourishing the plants. Excess water is collected in a gutter at the base and channeled back into the tank. This design offers two profound advantages: it is entirely isolated from the building’s plumbing, eliminating the primary source of leak risk, and it gives the user complete control over the water volume and nutrient content. While it requires manual refilling of the tank, this periodic task is a small price for the peace of mind that comes with a structurally contained water system.
The following table breaks down the critical differences, highlighting why the contained nature of a recirculating system makes it the only logical choice for failure-proofing a residential installation.
| Feature | Recirculating System | Direct Plumbed System |
|---|---|---|
| Water Source | Tank (manual refill) | Direct city water connection |
| Pump Required | Yes (submersible pump) | No (uses existing water pressure) |
| Leak Risk Profile | Lower (contained tank system) | Higher (permanent plumbing connections) |
| Apartment Suitability | High (no plumbing modifications) | Low (requires board approval) |
| Water Drainage | Recirculated back to tank | Sent to sewer drain |
| Typical Application | Smaller walls (under 12 feet) | Larger commercial installations |
| Maintenance Complexity | Moderate (manual tank refills) | Lower (automated water supply) |
Ferns vs Pothos: Which Plants Survive Vertical Gravity Best?
Plant selection for a vertical wall transcends simple light tolerance; it is an exercise in structural and mechanical engineering. While a Pothos tolerates light so low you can read by it, its vining growth habit and aerial roots are adapted for climbing, not necessarily for anchoring itself against the constant downward pull of gravity in a vertical medium. Ferns, conversely, often possess dense, fibrous rhizome root systems that create a more stable, integrated mat within the growing medium. This biomechanical consideration is paramount for long-term stability.
Professional designers employ a zoned approach to mitigate these forces. Hardy species with robust, soil-gripping root systems, like the Sword Fern (Nephrolepis), are used as structural anchors in lower sections. These plants are not only exceptionally tolerant of low light but are also highly effective at removing atmospheric formaldehyde, requiring minimal maintenance beyond annual pruning. This strategy treats the wall as a modular system, where more delicate or experimental species can be placed in easily swappable pockets, allowing for targeted replacement without disturbing the core ecosystem. This “design-for-failure” philosophy is key to a resilient, low-maintenance wall.
As the visual comparison above illustrates, the thick, waxy aerial roots of a Pothos contrast sharply with the fine, interwoven rhizomes of a fern. This structural difference dictates how each plant mechanically interacts with its substrate, influencing its ability to resist gravitational stress and soil erosion over time. Therefore, a successful planting strategy involves layering species not just by light needs, but by their root architecture to create a self-reinforcing, stable biological structure.
Case Study: Plant Selection Strategy for Low-Light Indoor Vertical Gardens
Professional vertical garden designers recommend a zoned approach for low-light apartment installations. Sword fern (Nephrolepis) is placed in lower, darker sections due to its exceptional low-light tolerance and minimal fertilization requirements, while also being highly effective at eliminating formaldehyde from the atmosphere. The maintenance protocol consists only of annual pruning and removal of dry fronds, with virtually no pest or disease susceptibility. For structural stability, hardier species with robust root systems are positioned as anchors, while more delicate plants are installed in easily swappable modular sections. This design-for-failure approach allows targeted replacement without dismantling the entire wall ecosystem.
The Mold Risk: How to Ventilate Behind a Green Wall?
A living wall is a zone of high transpiration and moisture, creating a micro-climate that, if unmanaged, is an ideal breeding ground for mold. The greatest risk is not on the face of the wall, but in the dark, unventilated space behind it where moisture can get trapped against your apartment’s drywall. Effective mold prevention is an active, not passive, engineering task. Simply opening a window is insufficient; you must design a system for continuous air exchange.
The primary defense is a structural air gap of 1-2 inches. This is achieved by mounting the entire living wall framework on standoffs, ensuring no part of the moist system directly touches the building substrate. This gap creates a channel for air to circulate. To make this circulation active, low-profile, silent computer fans or an inline fan system should be installed at the top and bottom of the gap. This creates a convective airflow loop, pulling dry air in from the bottom and expelling moist air at the top, preventing stagnation. This system is then fortified with an impermeable barrier, such as cement board or marine-grade plywood treated with a waterproof membrane, installed on the apartment wall before the living wall goes up.
Finally, this atmospheric engineering extends to the room itself. To create an environment hostile to mold, professional mold prevention specialists recommend maintaining a relative humidity between 30-50%. This is best accomplished with a smart dehumidifier. Advanced systems even link humidity sensors placed behind the wall directly to the dehumidifier or HVAC fan, triggering precision air exchange only when mold-conducive conditions are detected. This transforms mold prevention from a guessing game into a data-driven, automated process.
Action Plan: Engineered Ventilation for Mold Prevention
- Create Air Gap: Offset the entire living wall structure 1-2 inches from the wall substrate to allow continuous airflow.
- Install Active Fans: Position silent computer fans at the top and bottom of the air gap to create a convective airflow loop.
- Control Room Humidity: Use a dehumidifier to maintain the room’s relative humidity between 30% and 50%.
- Install Waterproof Backing: Use an impermeable barrier like Kerdi-Board or a liquid-applied membrane between the system and the drywall.
- Implement Smart Monitoring: Link humidity sensors behind the wall to an automated dehumidifier or fan for precision air exchange.
How to Hide Grow Lights So Your Living Wall Doesn’t Look Like a Lab?
In a low-light apartment, supplemental lighting isn’t optional; it’s the primary energy source for your ecosystem. However, the goal is to replicate the sun, not create a sterile laboratory aesthetic. The key is architectural integration—concealing the light source while precisely controlling its output. The most elegant solution is to build a custom soffit or use deep crown molding installed above the wall. This structure perfectly hides track lighting or high-CRI LED strips, creating a professional, gallery-style wash of light that appears to be part of the room’s design.
The technical specifications of this light are critical. For the lush foliage of most tropicals used in living walls, professional living wall system manufacturers recommend providing 200-400 foot-candles for 12-15 hours per day. This mimics the duration and intensity of a tropical day and is essential for robust photosynthesis. To prevent light spill into the living area, fixtures should be equipped with honeycomb louvers or barn doors. These accessories shape the light beam, focusing it exclusively on the plant wall and preventing glare.
For the ultimate in both plant and human well-being, a tunable-white LED system is the pinnacle of indoor lighting engineering. Connected to a smart home system, these lights can simulate a natural circadian rhythm: a cool, blue-white light (5000K+) in the morning to stimulate growth, gradually shifting to a warm, amber-white (2700-3000K) in the evening. This not only optimizes plant metabolism but also supports the natural sleep-wake cycles of the apartment’s human inhabitants, fully realizing the wall’s potential as an integrated wellness system.
- Build Custom Soffit: Install a structure above the wall to conceal track lighting or high-CRI LED strips.
- Use Focused Beam Control: Employ spotlights with honeycomb louvers or barn doors to illuminate the wall precisely and minimize light spill.
- Implement Circadian Lighting: Run lights for 12-15 hours daily, mimicking a natural tropical light cycle (e.g., 7 AM to 8 PM).
- Integrate Tunable-White LEDs: Use smart LEDs to simulate natural light changes, from cool morning light to warm evening light.
- Position Lights Strategically: Mount fixtures on the ceiling in front of the wall, or at the sides/bottom, to ensure sufficient intensity across the entire surface.
Real vs Preserved Moss: Which Offers Better ROI Over 5 Years?
When considering a green wall, a common crossroads is the choice between a living, breathing moss ecosystem and a preserved (dead) moss wall. While preserved moss offers a lower initial installation cost and zero maintenance, its value is purely decorative. A living moss wall, while requiring a greater initial investment in hardware and ongoing minor costs for water and electricity, is a functioning biophilic system that delivers a measurable return on investment far beyond aesthetics.
A living wall actively improves the indoor environment. It functions as a natural air purifier, removing VOCs and regulating humidity. Furthermore, its porous, complex surface acts as an effective sound dampener. In fact, acoustic research demonstrates that living walls measurably decrease the reverberation time of sound, softening ambient noise and creating a more tranquil space. From a real estate perspective, a fully integrated living wall is perceived as a luxury biophilic upgrade, whereas a preserved wall is seen as simple decoration. Over a five-year horizon, the active air quality, humidity regulation, acoustic, and wellness benefits of a real wall provide a tangible ROI that preserved moss cannot match.
The following table provides a total cost of ownership analysis over five years, clarifying the long-term value proposition of investing in a true living system.
| Cost Factor | Real Living Moss Wall (5 Years) | Preserved Moss Wall (5 Years) |
|---|---|---|
| Initial Installation | $130-250 per sq ft | $80-150 per sq ft |
| Water Costs | Moderate (2-3 min irrigation every other day) | Zero |
| Electricity (Lighting) | $50-150/year (LED grow lights) | Zero (ambient light sufficient) |
| Maintenance Labor | Quarterly checks, annual pruning | Occasional dusting only |
| Replacement Costs | 10-20% plant replacement over 5 years | Zero (static installation) |
| Air Quality Benefits | Active (removes VOCs, adds humidity) | None (decorative only) |
| Acoustic Performance (NRC) | 0.15-0.40 NRC (measurable noise reduction) | 0.10-0.20 NRC (minimal absorption) |
| Resale Perception | Luxury biophilic upgrade | Simple decorative element |
How to Install a Living Wall That Doesn’t Leak or Die?
A successful living wall installation is a methodical construction project, not an arts-and-crafts session. The process is one of layering engineered systems in the correct sequence to create a stable, leak-proof, and life-sustaining environment. The foundation of the entire assembly is the waterproof barrier applied to the apartment wall. This is non-negotiable. This membrane must be installed first, creating an impermeable shield that is the ultimate fail-safe against moisture damage.
Upon this barrier, mounting brackets are installed. These brackets create the critical air gap and provide the structural skeleton for the wall panels. The irrigation tubing is then integrated into this framework, with drip emitters carefully positioned to ensure even water distribution. Only after this “life-support hardware” is fully installed, tested, and leak-checked do the plant panels get mounted. These panels, often made of felt pockets or modular trays, come pre-planted or are planted in-situ. According to industry data, professional installers report that basic residential walls of 40-80 square feet typically require 3-5 days to install, with about half the time dedicated to hardware and waterproofing, and the other half to planting. This timeline underscores that the structural and plumbing work is at least as critical as the horticultural component.
The process of carefully aligning and securing each modular panel, as shown here, is the final step in assembling the ecosystem. This modularity is a key feature of modern systems, allowing for easy access to the irrigation hardware behind and enabling the simple replacement of individual plants without dismantling the entire wall. This methodical, system-first approach is the only way to guarantee a wall that will not leak or die.
The Humidity Risk: Will Wallpaper Peel in a Shower Room?
Placing a living wall near a high-humidity zone like a bathroom or in a room with wallpaper presents a complex moisture-management challenge. Intuitively, one might assume the wall would exacerbate humidity issues, causing wallpaper to peel. However, a properly engineered living wall acts as a natural humidity buffer. The plants and their growing medium absorb excess ambient moisture during high-humidity events (like a shower) and then slowly release it back into the air as the room dries. This helps to stabilize the room’s overall humidity, thereby protecting adjacent surfaces.
Of course, this natural buffering capacity must be supported by robust engineering. The waterproofing protocol is paramount. A liquid-applied waterproofing membrane (like RedGard) must be applied to the wall behind the living wall structure and, crucially, extended 12-24 inches to the sides. This creates an impermeable “splash zone” that shields the adjoining wallpaper from any potential moisture wicking. If wallpaper is an absolute must in this high-moisture zone, it must be installed with heavy-duty, mold-proof adhesives rated for marine environments. However, superior long-term alternatives include finishes like Venetian plaster, Tadelakt, or high-quality epoxy paint, which are inherently more resilient to humidity.
The installation must also include a 1-2 inch air gap for ventilation and a dedicated gutter or drain tray at the base to collect any runoff, preventing it from ever contacting the floor or wicking up the wall.
- Waterproof Backer Board: Use an impermeable material like Kerdi-Board or cement board behind the living wall.
- Extend Waterproofing Membrane: Apply a liquid membrane 12-24 inches beyond the living wall’s footprint to protect adjacent wallpaper.
- Install a Drainage Pathway: A gutter at the base is essential to collect and manage runoff water.
- Specify Moisture-Resistant Adhesives: If using wallpaper, choose a mold-proof adhesive rated for high-humidity or marine use.
- Maintain the Air Gap: Ensure a 1-2 inch offset from the building wall for constant airflow and moisture escape.
Living Walls as Humidity Buffers in High-Moisture Environments
Indoor vertical garden systems demonstrate counter-intuitive humidity regulation properties. Living walls can actually stabilize room humidity by absorbing excess moisture during high-humidity events (showers, cooking) and releasing stored moisture when air becomes dry, thus protecting adjacent surfaces. An interior green wall acts as a natural buffer, improving humidity levels while also purifying air. Professional installations integrate waterproof backing systems: liquid-applied waterproofing membranes are applied to the wall behind the living wall structure and extended 12-24 inches to the sides, creating an impermeable zone that protects adjacent finishes like wallpaper. For walls near high-moisture areas, marine-grade adhesives designed for boats are specified when wallpaper must be used, though alternatives like Venetian plaster or epoxy paint offer superior long-term resilience.
Key Takeaways
- System Over Species: The success of a living wall depends more on its engineered irrigation and ventilation systems than on the specific plants chosen.
- Engineer for Failure: A recirculating irrigation system, structural air gaps, and a waterproof membrane are not optional upgrades; they are essential components for preventing leaks and mold.
- Light is an Input: In low-light, supplemental lighting is a non-negotiable energy input. Its integration must be architecturally planned for both aesthetic appeal and precise botanical function (200-400 foot-candles).
Why Does Biophilic Design Improve Sleep Quality in Urban Apartments?
The drive to integrate a living wall into an urban apartment is rooted in an innate human need for connection to nature, a concept known as biophilia. This connection is not merely aesthetic; it has profound, measurable physiological and psychological benefits, particularly concerning stress reduction and sleep quality. Urban environments are filled with stressors that elevate cortisol levels, a hormone that disrupts natural sleep patterns. Biophilic elements, like a living wall, work to counteract this.
The mechanism is twofold. First, the visual presence of vibrant, living greenery has a restorative effect on the mind. In a landmark study, research published in Environmental Health Perspectives reveals that participants in biophilic indoor environments showed significantly faster cortisol recovery after a stressor. By helping to down-regulate the body’s stress response, the living wall prepares the mind for restful sleep. This is supported by further research showing that, according to workplace research conducted in China, higher levels of indoor greenery led to workers reporting better sleep quality and lower stress.
Second, the engineered systems supporting the wall contribute to a healthier sleep environment. As INTEGRIS Health notes in its work on the subject:
Natural light, a key element of biophilic design, plays a crucial role in regulating circadian rhythms and promoting better sleep quality.
– INTEGRIS Health, Benefits of Biophilic Design article
While natural light is scarce in low-light apartments, a well-engineered, tunable-white grow light system that mimics the sun’s daily cycle serves the same purpose. By providing bright, cool light in the morning and warm, dim light in the evening, the system helps to anchor the resident’s circadian rhythm, promoting alertness during the day and sleepiness at night. The living wall thus becomes more than a feature; it is an active participant in the wellness of the home, an engineered ecosystem designed for both botanical and human thriving.
By shifting your perspective from that of a gardener to a bio-engineer, you can create a resilient, self-sustaining piece of living architecture that actively enhances your well-being. To begin this journey, the next logical step is to design the foundational systems of your specific project with these engineering principles in mind.