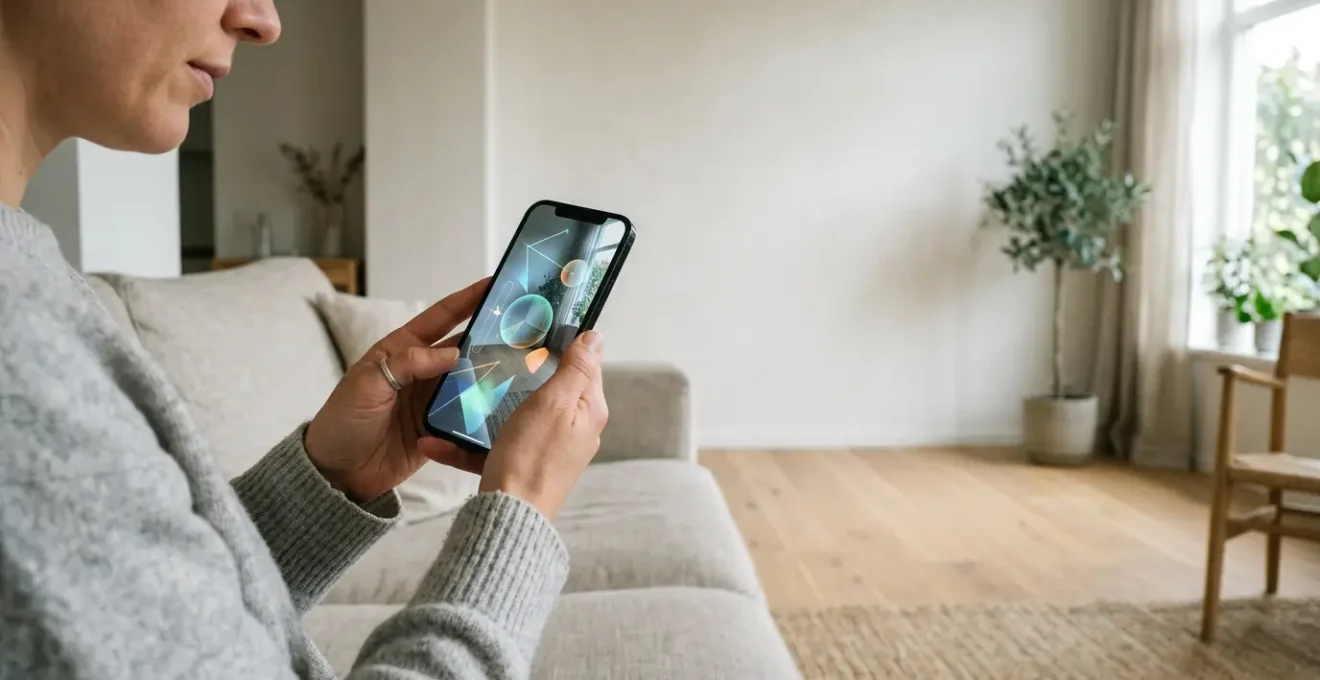
Using augmented reality to “see” furniture in your room is easy, but trusting what you see is the hard part that determines whether you’ll love or return your purchase.
- Your phone’s technology (LiDAR vs. a standard camera) drastically impacts the accuracy of measurements and object scale.
- AR models are notoriously bad at replicating real-world color and texture, creating a “lighting lie” that can lead to disappointment.
Recommendation: Use AR as a scale and clearance validation tool, not for final color decisions. Always calibrate your app and cross-reference with physical fabric swatches.
The excitement of finding the perfect sofa online can quickly turn into a logistical nightmare. You click “buy,” wait weeks for delivery, and the moment it’s unboxed, your heart sinks. It’s either a monstrous beast that swallows your living room whole or a comically tiny piece that looks lost in the space. This frustrating—and expensive—cycle of buying and returning bulky furniture is a common pain point for online shoppers. The costs, both in shipping fees and environmental impact, are significant.
The common advice is simple: “Just use an augmented reality (AR) app!” And while tools from retailers like IKEA and Wayfair seem like a magical solution, they are not infallible. There is often a significant digital-to-physical gap between the glowing object on your screen and the final product under your home’s unique lighting. Relying on AR without understanding its limitations is like navigating with a compass you haven’t calibrated.
The key to success isn’t just *using* AR; it’s using it as a strategic validation tool. This guide moves beyond the basics to reveal the critical checks and balances you need to perform. We’ll explore how your phone’s hardware affects accuracy, why you can’t trust AR for color, and how to use these apps to make confident, regret-free decisions. By mastering these nuances, you can finally bridge that gap and ensure what you see on your screen is what you get in your room.
Summary: How to Use Augmented Reality Apps to Validate Furniture Scale Before Buying?
- Lidar vs Camera: Which Phone Tech Measures Room Dimensions Accurately?
- The “Lighting Lie”: Why AR Colors Don’t Match Real Life Fabrics
- How to Use AR to Check Walkway Clearance Around Virtual Furniture?
- Brand Apps vs Generic AR Tools: Which Offer Better Catalogs?
- How to Share AR Views With a Partner for Remote Decision Making?
- E-Design vs Full Service: Which Fits a DIYer’s Needs?
- How to Calculate the Perfect Scale for a Statement Sofa in a 12×12 Room?
- Why Does Hiring an Interior Designer Save Money on Mistakes in the Long Run?
Lidar vs Camera: Which Phone Tech Measures Room Dimensions Accurately?
Not all AR experiences are created equal, and the technology inside your smartphone is the single biggest factor determining accuracy. Most phones use a standard camera to create AR projections. This method relies on software algorithms to analyze the 2D video feed, identify flat surfaces like floors and walls, and estimate depth and scale. While impressive, it’s fundamentally a sophisticated guess.
In contrast, newer high-end devices (like recent iPhone Pro and iPad Pro models) are equipped with a LiDAR (Light Detection and Ranging) scanner. This dedicated sensor actively fires out infrared laser beams to create a precise 3D depth map of your space in real-time. This isn’t a guess; it’s a direct measurement. The difference in precision is substantial: industry data shows LiDAR-enabled devices can achieve 92-95% accuracy in AR furniture visualization, compared to 85-89% for standard camera-based AR. A few percentage points may not sound like much, but it can be the difference between a sofa that fits perfectly and one that’s two inches too long for your wall.
Because you can’t be sure of your device’s baseline accuracy, performing a quick fidelity check is non-negotiable before trusting any virtual placement. This simple process of self-calibration empowers you to understand the specific margin of error for your phone and app, turning a blind guess into an informed estimate. It’s the most crucial step a tech-savvy shopper can take.
Your Action Plan: The AR Self-Calibration Test
- Select a Known Dimension: Find an object with a standard, known size. A standard interior doorway is often 36 inches wide, or an A4 sheet of paper is 11.7 inches long.
- Measure with AR: Use your AR app’s measurement tool to measure that object from a few different angles and distances.
- Compare the Readings: How close is the app’s measurement to the real one? A LiDAR device should be within a centimeter or two, while a camera-based app might be off by several centimeters.
- Test in Different Light: Repeat the measurement in bright daylight and then in lower, artificial evening light to see how performance changes.
- Move Slowly: When scanning your room or measuring, move your phone slowly and steadily. LiDAR sensors perform best with smooth movement as they map objects up to 5 meters away.
The “Lighting Lie”: Why AR Colors Don’t Match Real Life Fabrics
You’ve found a virtual sofa in the perfect shade of emerald green. It looks stunning on your screen, complementing your existing decor flawlessly. You place the order, and it arrives… as a dull, muddy olive. This is the “Lighting Lie,” one of the most common and disappointing failures of AR technology. The color and texture you see in an AR app are, at best, a simplified approximation.
AR models are digital renderings placed into a live video feed of your room. The app tries to simulate how light would interact with the virtual object, but it cannot truly replicate the complex interplay of factors that define how a color appears in reality. Your room’s specific lighting—the warm afternoon sun from a west-facing window, the cool-toned LED bulbs in your ceiling fixture, the reflection from a colorful rug—all dramatically alter how you perceive a fabric’s hue and texture. An app can’t account for the subtle sheen of velvet or the nubbly texture of a bouclé fabric.
Case Study: The Limits of AR Lighting
Research confirms this limitation. One study on AR in the furniture industry tested visualization systems under various conditions. It found that while positional accuracy could be extremely high under controlled lighting, the color rendering and shadow casting remained basic approximations. The systems were unable to replicate how fabric textures interact with changing natural light throughout a day, highlighting the gap between digital simulation and physical reality.
The only foolproof solution is to bridge the digital-to-physical gap yourself. Use AR to confirm an item’s scale, proportion, and general shape. But for color and material, you must get a physical fabric swatch. Place it in your room. Look at it in the morning, at noon, and at night under artificial light. This is the only way to truly know how that “emerald green” will look and feel in your actual living space.
How to Use AR to Check Walkway Clearance Around Virtual Furniture?
A beautifully furnished room is about more than just stylish pieces; it’s about how you move through the space. One of the most expensive design mistakes is buying furniture that is technically the right size for a wall but destroys the room’s flow. An oversized coffee table can create a frustrating bottleneck, while a sofa that’s too deep can make a walkway feel cramped. This is where AR truly shines as a spatial context tool.
Your goal is to use the virtual furniture to visualize and protect your circulation paths. Professional designers adhere to standard measurements for comfortable living. For instance, a major walkway should have at least 36 inches (about 3 feet) of clear space. The gap between a sofa and a coffee table should be around 18 inches—close enough to reach, far enough to walk past. AR allows you to test these standards virtually before committing.
To do this effectively, don’t just place the virtual sofa and eyeball it. Use the measurement tools within most AR apps as a digital tape measure. After placing your virtual sofa, measure the distance from its front edge to the opposite wall. Is there enough room for your desired coffee table *and* a comfortable path? Measure the clearance on either side. Can you walk by without turning sideways? By actively measuring these negative spaces, you move from passive viewing to active spatial validation, preventing costly and frustrating layout mistakes.
Brand Apps vs Generic AR Tools: Which Offer Better Catalogs?
When you start exploring AR, you’ll encounter two main types of applications: brand-specific apps and generic room-planning tools. Each serves a very different purpose, and knowing which one to use is key to an efficient workflow. Brand apps, like IKEA Place or Wayfair’s “View in Room 3D,” are powerful marketing tools designed to sell you their products.
Their primary strength is model fidelity. The virtual furniture you see is often a highly accurate, true-to-scale 3D model of the actual product. However, their catalog is a walled garden; you can only visualize items that specific brand sells. This is perfect for the final stages of validation when you’ve already decided on a product from that retailer. The popularity of this approach is clear; industry data reveals the IKEA Place app alone has been downloaded over 8 million times.
Generic AR tools like ARPlan 3D or Roomle take the opposite approach. They are not tied to any retailer. Their strength lies in universal space planning. You can’t browse a catalog of real-world furniture, but you can create a “volumetric proxy”—a simple box or geometric shape with custom dimensions. This is incredibly useful for:
- Vintage or Custom Furniture: See how that one-of-a-kind marketplace find will fit by creating a box of its exact dimensions.
- Initial Layouts: Quickly test different configurations (e.g., “Would an L-shaped sofa or a sofa with two chairs work better here?”) using basic shapes.
- Multi-item Planning: Lay out an entire room with multiple proxy items, something most brand apps struggle with.
| Feature | Brand Apps (IKEA Place, Wayfair) | Generic AR Tools (ARPlan 3D, Roomle) |
|---|---|---|
| 3D Model Fidelity | High-quality, true-to-scale models | Basic geometric shapes, proxy volumes |
| Catalog Size | Limited to brand’s own products | Universal – works with any furniture dimensions |
| Multi-Item Placement | Typically one item at a time; some brands offer limited multi-placement | Unlimited items, full room layout planning |
| Custom/Vintage Furniture | Not supported | Supported via manual dimension input |
| Best Use Case | Final validation before purchase from that specific retailer | Initial space planning, testing multiple configurations, vintage items |
The smartest workflow uses both: start with a generic tool for initial space planning with volumetric proxies, then switch to a brand app for the final high-fidelity validation of a specific product before purchase.
How to Share AR Views With a Partner for Remote Decision Making?
Making a major furniture purchase is often a team decision. But when you and your partner, roommate, or designer can’t be in the same room at the same time, conveying the scale and feel of a virtual object can be difficult. A simple screenshot often isn’t enough; it lacks the spatial context needed to make a confident joint decision. This is where AR’s ability to build consensus becomes a huge asset, especially when you consider that research shows customers who interact with AR features are significantly more likely to feel confident enough to buy.
To communicate effectively, you need to create a “capture package” that gives your partner a complete picture. A single static image from one angle is easily misinterpreted. By providing multiple perspectives, you can preemptively answer questions and build alignment. Follow this simple but effective protocol for remote collaboration:
- Record a Panning Video: Don’t just send a photo. Record a short, 15-20 second video where you slowly walk around the virtual furniture. This shows all angles and, most importantly, its relationship to other elements in the room like windows, doors, and existing furniture.
- Capture the “First Impression” View: Take a screenshot from the main entrance of the room. This shows what a person would see the moment they walk in, providing a critical first-impression perspective.
- Show the Everyday Perspective: Take another screenshot from your primary seated position, such as your favorite spot on the current sofa or your desk chair. This demonstrates how the new piece will fit into your daily life and sightlines.
- Use a Scale Anchor: Always try to include a familiar object in the frame—a person, a pet, or even a houseplant. This provides an immediate, intuitive sense of scale that numbers on a screen can’t match.
- Annotate Your Screenshots: Use your phone’s built-in markup tools to draw directly on the screenshots. Add arrows and key measurements, like the walkway clearance you measured, to provide definitive, visual documentation.
By sending this complete package instead of a single, ambiguous screenshot, you transform a confusing remote process into a clear, collaborative, and money-saving decision-making session.
E-Design vs Full Service: Which Fits a DIYer’s Needs?
Augmented reality apps are incredible tools for the modern DIYer, empowering you to make decisions with a level of confidence that was previously impossible. But it’s also important to recognize their limitations and know when your project might benefit from professional expertise. The choice often comes down to AR apps versus E-Design services. As Steve Bauer, a VP at furniture retailer Arhaus, noted, ” Buying furniture is the third-largest purchase you’re going to make in your life. We really want the customers to truly invest in these pieces.” Given the stakes, understanding your options is critical.
AR apps are your go-to for single-item validation. They are perfect for answering specific, isolated questions: “Will this 84-inch sofa fit on my 10-foot wall?” or “Is this armchair too bulky for that corner?” They are immediate, free, and excellent for building confidence on a piece-by-piece basis.
E-design services, on the other hand, are for when you need a comprehensive, cohesive plan. An e-designer doesn’t just validate one item; they create a complete vision for the entire room. This typically includes a mood board, a detailed floor plan, a curated shopping list with sourcing links, and professional guidance on how all the pieces work together in terms of style, color, texture, and scale. This is the right choice when you’re transforming a whole room and need help creating a unified aesthetic, not just checking if one sofa fits.
| Aspect | AR Apps (DIY Tool) | E-Design Services |
|---|---|---|
| Cost | Free to minimal (app download) | $300-$2000+ per room |
| Scope | Single-item validation, scale testing | Comprehensive plan: mood board, floor plan, shopping list, style curation |
| Expertise Required | User-driven, intuitive interface | Professional designer guidance |
| Time Investment | Immediate (minutes) | 1-3 weeks turnaround |
| Output | Visual confirmation of fit and scale | Complete design package with sourcing links |
| Best For | Quick single-purchase decisions, scale verification, DIY confidence building | Complete room transformations, cohesive design vision, multiple purchases |
For a dedicated DIYer, the best approach is often a hybrid. Use free AR apps for your own initial validation and confidence-building. If the project scope grows into a full room makeover and you feel overwhelmed, investing in an e-design service can be a smart, money-saving move that prevents a collection of individually “correct” but collectively mismatched purchases.
How to Calculate the Perfect Scale for a Statement Sofa in a 12×12 Room?
Let’s get specific. One of the most common decorating challenges is choosing a primary sofa for a standard-sized room, like a 12×12 foot (or roughly 3.6×3.6 meter) space. The temptation is to either “play it safe” with a small loveseat, which can look underwhelming, or to “go big” with a massive sectional that suffocates the room. The right scale is all about proportion, and AR is the perfect tool to visualize it.
A classic interior design rule of thumb is the two-thirds rule. Your sofa should occupy roughly two-thirds of the length of the wall it’s placed against. In a 12-foot (144-inch) room, this means you should be looking for a sofa that is around 8 feet (96 inches) long. This size is substantial enough to be a “statement” piece without overwhelming the space, leaving about 2 feet of “breathing room” on either side. This negative space is crucial for preventing the room from feeling cramped.
This is where you put AR to work. Find a sofa you like that is approximately 96 inches long and place its virtual model against the main wall in your 12×12 room. Can you immediately see the balance? The breathing room on the sides? Now, try a 72-inch loveseat—does it look lost? Then try a 115-inch sectional—does it feel like it’s eating the room? This hands-on, visual comparison is infinitely more powerful than just looking at numbers on a product page.
Getting this single measurement right has a massive financial impact. According to industry data, retailers see a 40-70% reduction in furniture return rates when customers use AR. More specifically, size-related returns—the most common and costly issue—decrease dramatically. Using AR to validate scale isn’t just a fun tech gimmick; it’s a direct, money-saving strategy.
Key Takeaways
- LiDAR technology in newer phones offers superior measurement accuracy (92-95%) compared to standard camera-based AR (85-89%).
- Never trust augmented reality for final color decisions; always order physical fabric swatches to test them in your room’s actual, changing light.
- Use AR as a spatial planning tool to verify there is at least 3 feet of clearance for major walkways around your virtual furniture.
Why Does Hiring an Interior Designer Save Money on Mistakes in the Long Run?
While AR technology empowers DIYers more than ever, there’s a point where the cost of a mistake outweighs the savings of doing it yourself. Hiring an interior designer might seem like a luxury expense, but it’s often a pragmatic financial decision that saves money by preventing a cascade of costly errors. A designer’s value isn’t just in picking nice colors; it’s in their ability to orchestrate a complete, functional, and cohesive space, avoiding problems you might not even foresee.
A designer prevents mistakes in scale, proportion, flow, lighting, and material cohesion that go far beyond what a single-item AR app can validate. They think about the room as a total system. For example, you might use AR to confirm a beautiful new media console fits perfectly on a wall, but a designer would foresee that its dark wood finish will absorb all the light in that corner, requiring an expensive new floor lamp to compensate. They prevent the domino effect of one “right” decision causing three new problems.
Interestingly, modern designers don’t see AR as a competitor but as a vital communication tool. They are increasingly using this technology to bridge the gap between their 2D floor plans and the client’s real-world visualization.
Case Study: AR as a Client-Designer Communication Bridge
Professional designers are leveraging AR to enhance client communication. According to a report by NewRoom.io, by showing clients AR representations of proposed furniture in their actual spaces, designers can get instant feedback and accelerate the decision-making process. This hybrid approach combines the designer’s holistic expertise with the client’s ability to validate scale in real-time, reducing misunderstandings and preventing costly orders of items the client didn’t fully visualize from a floor plan alone.
Ultimately, a designer acts as your project manager and quality control expert, saving you money by consolidating orders, accessing trade discounts, and, most importantly, ensuring the final result is a harmonious whole, not just a collection of individually correct but ultimately discordant parts. Their fee is often an insurance policy against a much more expensive, piecemeal redesign down the road.
Whether you choose to move forward as a tech-empowered DIYer or decide to partner with a professional, the power is now in your hands. You have the knowledge to use AR as an intelligent validation tool, ensuring your next big furniture purchase is a source of joy, not a return shipment waiting on the curb.